


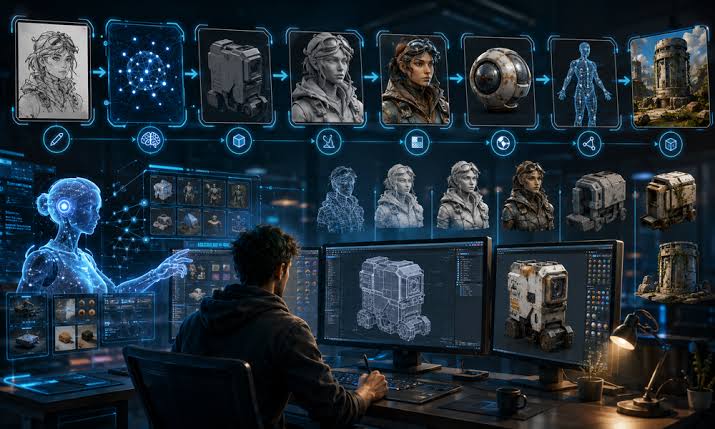
Key Takeaways
- Define the image’s purpose, audience, channel, and requirements before creating it.
- Choose the right starting input, such as a prompt, reference image, sketch, or existing photo.
- Keep prompts focused on the subject, setting, composition, style, and key constraints.
- Generate a small number of purposeful variations instead of endless drafts.
- Refine one important element at a time to maintain control and consistency.
- Review images carefully for accuracy, quality, text, product details, and context.
- Prepare separate versions for different platforms and screen sizes.
- Keep original files, prompts, edits, approvals, and version records organized.
- Use human judgment throughout the workflow to ensure the final visual is useful, accurate, and trustworthy.
Creating an AI-assisted image is easy. Creating one that supports a real business goal, fits the channel, and survives careful review takes a repeatable process. Whether you are comparing a magnificent AI alternative for enhancement or building visuals with multiple tools, the strongest results come from treating generation as a single stage in a larger production workflow. A dependable workflow reduces random experimentation and gives every draft a purpose. It helps teams move from an early concept to a useful final asset by defining the goal, choosing suitable inputs, refining only what matters, and preserving the records needed for future edits or approvals.
Why An AI Image Workflow Matters
One-off generations often produce attractive but inconsistent images. A workflow separates a rough concept from a working draft and a publish-ready asset. For example, a hero image for an outdoor gear product page needs a clear product, room for copy, mobile-friendly framing, and accurate details. Brief, input, generation, editing, review, and export each solve a different problem.
Start With A Clear Creative Brief
Write the brief before the prompt. The brief gives the image a job to do and prevents style choices from overtaking the message. Include the audience, publishing channel, main subject, mood, essential colors or objects, required dimensions, and any details that must remain unchanged. For example: “Create a mobile shopping image for a fictional outdoor gear brand. Show a rust-orange insulated jacket on a hiker at dawn, with a clean mountain background. Keep the jacket color, zipper placement, and logo area consistent. Leave clear space above the subject for a short headline.”
Choose The Right Starting Input
The right starting input depends on how fixed the visual needs to be. Use a text prompt when the idea is open. Use a reference image for lighting, composition, or mood. Use a rough sketch when object placement matters. An existing photo is useful for targeted edits, while a product asset is best when shape, color, and recognizable details must stay stable.
Build A Short, Useful Prompt
A useful prompt is specific without becoming a crowded list of disconnected adjectives. Start with the subject, then describe the setting, visual style, composition, and constraints. Mention camera angle, lighting, palette, object spacing, and intended placement when those factors affect the outcome.
- Realistic scene: “Orange insulated hiking jacket on a hiker standing three-quarters toward camera at sunrise, alpine trail, realistic outdoor product photography, soft side light, vertical mobile composition, clean sky area for headline.”
- Editorial illustration: “Flat editorial illustration of a hiker packing an orange jacket, geometric mountain shapes, limited earth-tone palette, simple shadows, spacious vertical composition for a mobile article card.”
Generate And Compare Variations
Treat the first output as a draft, not a verdict. Generate a small set of options, then compare them against the brief. Does the subject stand out immediately? Does the crop work at a small size? Are the key objects correct, and is there space for captions or interface elements? Select one or two promising directions instead of endlessly producing more images.
Refine The Strongest Direction
Make one controlled change at a time. Correct the product shape or pose first, then adjust crop, camera angle, lighting, contrast, or distracting background elements. Repair hands, faces, reflections, text, and small product details before increasing resolution. Upscaling can improve delivery quality, but it cannot fix a weak composition or make an inaccurate visual claim trustworthy.
Run Quality And Accuracy Checks
Visual Review
Inspect the image at full size and on a phone. Check eyes, hands, repeating patterns, reflections, logos, and any generated lettering. Confirm that the focal point still works after likely crops. Synthetic imagery needs extra care because plausible details can still mislead viewers, as concerns about AI-generated satellite imagery demonstrate.
Context Review
Confirm that a creative visual does not imply unsupported facts. Keep documentary material distinct from illustrations or concepts, label substantially generated or altered images when appropriate, and retain the original file for comparison. Editorial teams should remember that a cleaner image can tell a different story when edits alter a scene’s meaning.
Prepare Files For Each Channel
A master image is rarely the final deliverable. Create channel-specific versions for desktop, mobile, email, social posts, or print. Use the correct aspect ratio, keep important subjects away from crop zones, choose sensible compression, and test text contrast. Save an untouched master before making platform-specific adjustments so later changes do not require rebuilding the image.
Track Versions, Sources, And Edits
Simple asset notes prevent confusion when work moves between creators, reviewers, clients, and publishing systems. Record the original file name and source, creation date, prompt or edit instructions, software used, approved version, rejected versions, reviewers, intended channel, and usage approval. Provenance and change history make it easier to explain how an image was made and identify what changed.
Common Workflow Mistakes To Avoid
- Starting with a tool instead of a clear goal.
- Changing many variables at once and losing track of the improvement.
- Ignoring the final display size, especially on mobile.
- Trusting generated text, labels, or product details without review.
- Using one crop for every channel.
- Deleting the source file.
- Skipping human review of context and accuracy.
A Simple AI Image Workflow Checklist
- Define the image purpose and requirements.
- Choose the right starting input.
- Create a short, focused prompt.
- Generate a limited set of options.
- Refine the strongest direction.
- Review visual quality, accuracy, and context.
- Export channel-specific files and save change notes.
Final Thoughts
The best AI image workflow is not the one that produces the most drafts. It is the one that turns a clear idea into a useful, accurate, well-prepared visual that serves a specific purpose. A strong process begins with a detailed brief, appropriate references, and clear expectations for style, audience, format, and message. Careful edits, purposeful variations, human review, and reliable asset records make AI-assisted image production faster without sacrificing care. By checking details before publication and keeping successful workflows organized, teams can reduce unnecessary revisions, maintain visual consistency, and create images that are both efficient to produce and valuable to the people who see them.